
Graphic design and web design are two distinct visual fields that have different requirements, best practices and methodologies.
For example, it’s much easier in web design to use pixel-based/raster-based file formats (like JPG, GIF or PNG). Conversely, vector files such as EPS and AI — which are scalable without leading to pixelation — are better suited for graphic design, for things like logos that might be used in a variety of sizes. As of yet, vector-based graphics designed for the web (such as SVG or HTML5 Canvas) are not universally and uniformly supported in all browsers.
In addition, graphics meant for web use have certain best practices associated with them. One of these best practices is that you should be conscious of file weight because you want your web pages to be as fast as possible. As a web designer, you have to try to reduce the amount of HTTP requests done by your graphics — whether through lowering the amount of images you use or combining some of them into a CSS sprite — as well as make sure you pick the right image format that strikes a perfect balance between file size and image quality.
Photoshop is an industry-standard tool used by both graphic designers and web designers. What follows are some simple tips to follow as you create graphics meant for use on websites.
1. Save Your Graphics with the "Save for Web & Devices" Command
In web design, you have to make sure that your images are as small in file size as possible. But it’s more than that — your images need to look good as well.The perfect approach to creating graphics in Photoshop is by balancing image quality and file size.
A common mistake that web designers make is using the Save as command instead of the Save for Web & Devices command in Photoshop.
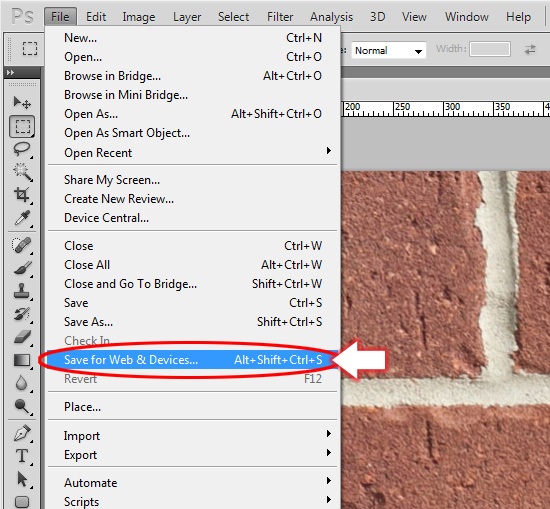
The Save for Web & Devices command creates files optimized for web design, in terms of image quality, image resolution, browser compatibility and file size.
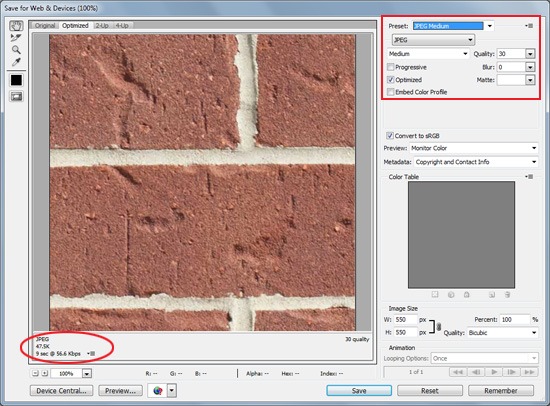
The command additionally has a dialog window that you can use to fine-tune your images. While you tweak the settings of your graphic, it will show you its effects on file size and image quality.
In comparison, the Save as dialog window doesn’t have as many options and often creates images that are larger in terms of file size.
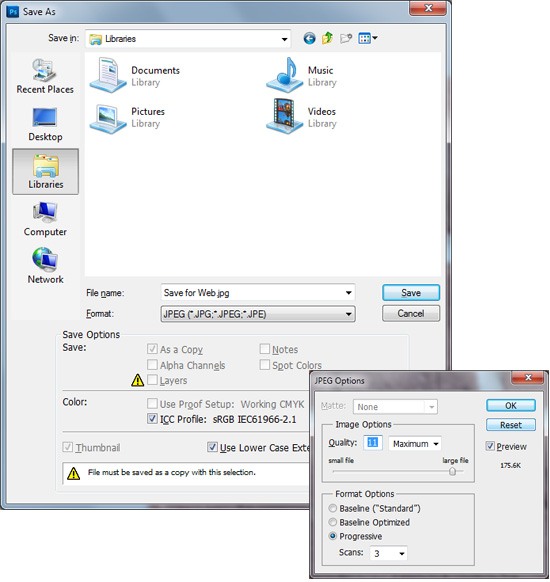
Below is a comparison of the same image saved using the Save for Web & Devices command and the Save as command. Notice that the file size difference is significant.
2. Consider Using Web-safe Colors
Web-safe colors will display correctly in most browsers and on most monitors, ensuring your website looks the same no matter where it’s viewed.The two easiest ways to guarantee that the colors you use are web-safe are as follows.
"Only Web Colors" Option
In the Color Picker dialog window, check the "Only Web Colors" option located at the bottom-left corner. This will limit the colors being displayed in the window to just web-safe colors.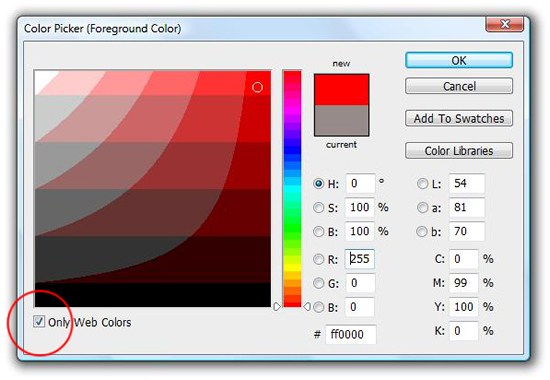
Convert a Color to a Web-safe Color
Convert any color into the closest web-safe color by clicking on the little cube in the Color Picker (next to the "Current" and "New" color boxes).
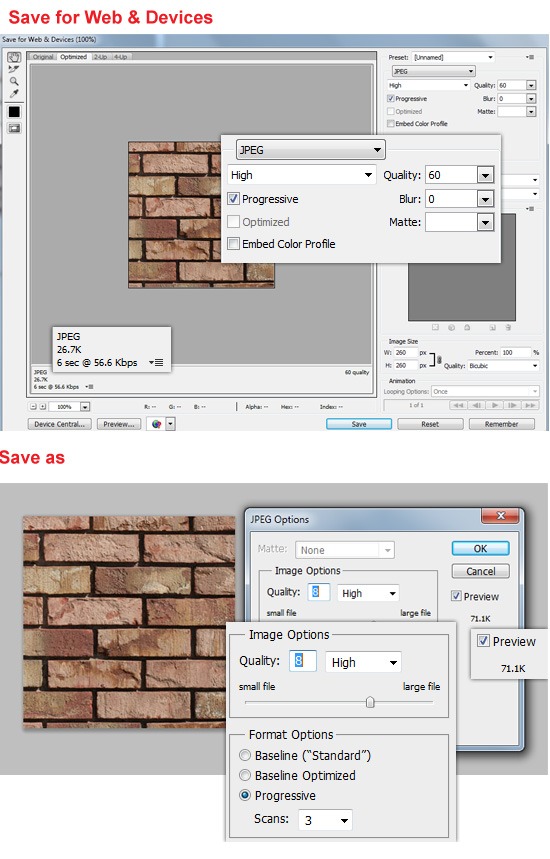
3. Consider Using the "Progressive Scan" Option for JPG
The JPG file format is ideal for photographic and high-resolution images. Depending on your projected audience, a progressive scan JPG can be the way to go, as the image will gradually render as the site loads (though on modern broadband Internet connections, this type of wait time is rarely an issue). This allows the user the ability to quickly see the image before it fully downloads, making the web page feel more responsive.
For a more extensive guide on the subject, read JPEG 101: A Crash Course Guide on JPEG.
4. Save Graphics with Transparency as PNGs
The PNG image format is great for images that need to be rendered with transparency.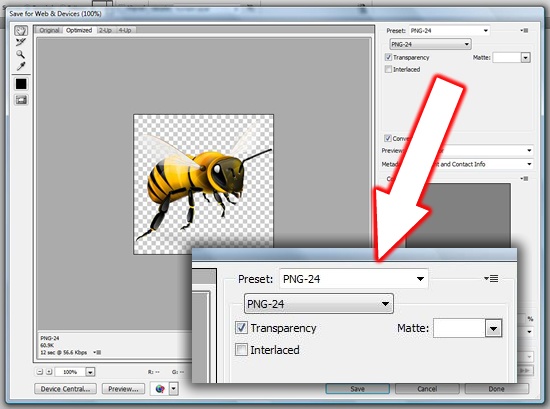
PNG transparency is supported in most mainstream browsers but watch out if you find yourself having to cater to IE6: parts of your PNG that are meant to be transparent will show up gray. There are workarounds to avoid this issue (e.g., IE PNG Fix JavaScript library) but they can be a hassle to implement.
For more information on PNGs, read the Web Designer’s Guide to PNG Image Format.
5. Save Animated Graphics as GIFs
The GIF image format, while now mostly replaced with PNG, is still useful for one thing. While they are noticeably grainier than PNG and JPG files, one important feature of the GIF image format is its ability to be animated.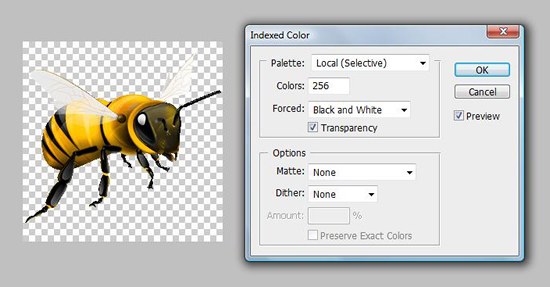
While there is an extension of the PNG image format called APNG (which stands for Animated Portable Network Graphics), it lacks browser support.
If you’re choosing between PNG and GIF, it’s usually a good idea choose PNG unless the image is to be animated.
6. Pay Attention to the "Download Time" Information
It’s vital to make sure that a site loads quickly and looks good, which is why saving and optimizing your graphics is important. Below, see what a simple change in a file-saving option can do to an image’s file size.JPEG at Maximum Quality
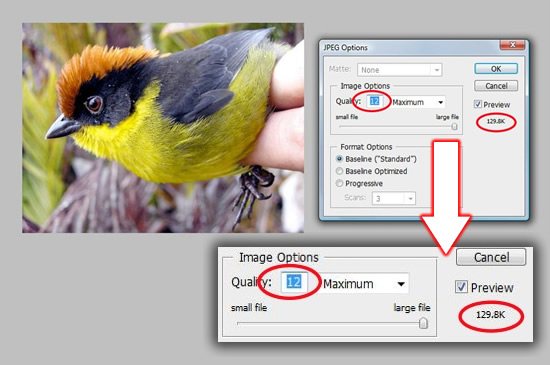
JPEG at Low Quality

A good practice to follow is to lower the quality until you visibly notice degradation in image quality.
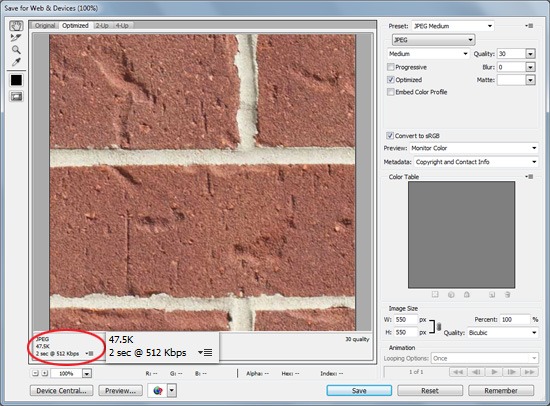
When you’re optimizing your images, always pay attention to the Download Time, which is displayed on the lower-left corner of the Save for Web & Devices dialog window. Below, you can see that the image being saved will take approximately 2 seconds to download on a DSL Internet connection at its current settings.
No comments:
Post a Comment