In this article, I will show you how to synchronize the databases between on-premise SQL server and SQL Azure. FYI, no code involved in this demonstration.
Register for SQL Azure Data Sync Service
- Navigate to https://datasync.azure.com/
- Read the Terms Of Use.
- Check the "I have read and I accept the Terms Of Use" checkbox, if you accept the Terms Of Use.
- Click Next.

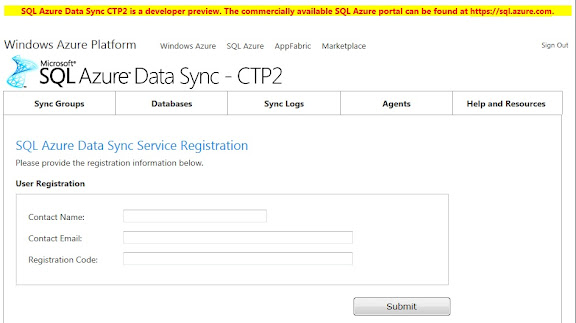
- Fill out the "User Registration" form.
"Registration Code" can be applied from https://datasync.azure.com/ - Click Submit.

Create an Agent for your SQL Server Database
- Once your SQL Azure Data Sync account is ready, return to the SQL Azure Data Sync UI.
- Navigate to Agents tab.
- Click Generate Agent Key.
- Enter the Agent’s name and click Generate.
- Then, highlight the Agent key and copy it to the clipboard.
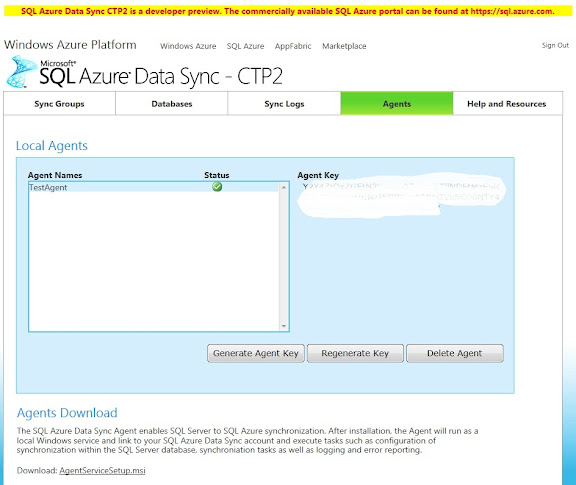
- Install the AgentServiceSetup.msi by clicking the download link.
- Install the service accordingly to the instruction.
- Once the installation completed, launch the Agent Configuration Tool from Start | All Programs | Microsoft SQL Azure Data Sync CTP | SQL Azure Data Sync Agent CTP2.
- Configure AgentConfigData.xml
- Check the "Encrypt Password" checkbox.

- Click "Edit Agent Key" and paste the agent key from your clipboard into the Agent Key space.
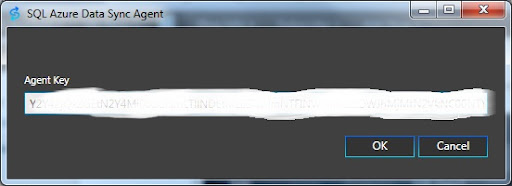
- Click "Ping Sync Service" to confirm that the Sync Service is running and your proxies can successfully connect to the service.
- "Successfully pinged service" alert will pop up if the connection successfully established.
Add SQL Server Databases to the Agent
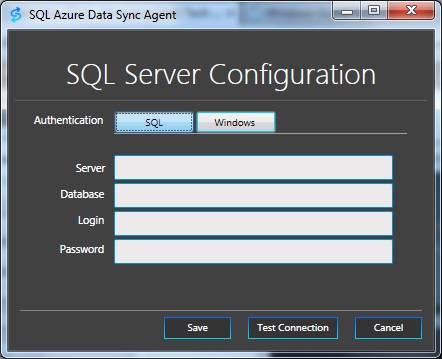
- Click "Add Member" from the toolbar.
- Add the SQL Server details.
- Click "Test Connection".
- If the connection succeeds, click Save and close the dialog.
- Run SQL Azure Data Sync Agent Service
- Open run.exe.
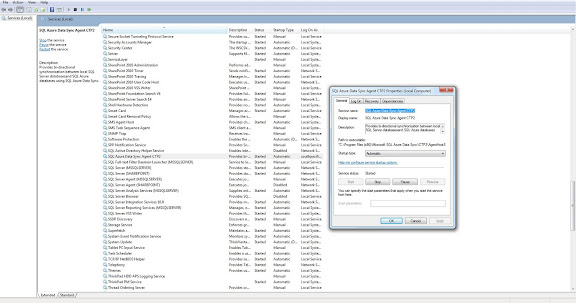
- Search for services.msc.
- Click on the program called "Services".
- Look for SQL Azure Data Sync Agent CTP2.
- Right click on it and Start the service.
- Click Apply then click OK.
- Close the Services window and return to the SQL Azure Data Sync web UI.
- Navigate back to https://datasync.azure.com/
- Go to "Databases" tab.
- Click "Add".
- Register your database accordingly for your on-premise SQL Server and SQL Azure server.

* For the first time synchronization, please create a SQL Azure database.
Register the SQL Server Databases
Create a Sync Group
- Navigate to https://datasync.azure.com/
- Go to "Sync Groups" tab.
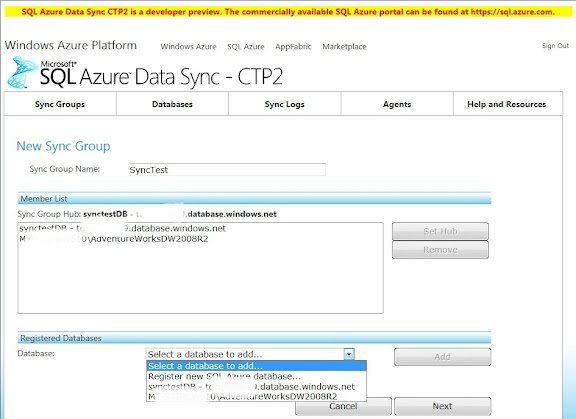
- Click "New Sync Group".
- Click on the "Registered Databases" dropdown list.
- Add both on-premise SQL Server and SQL Azure server databases into the "Member List".
- Type your preferable "Sync Group Name" and click Next.
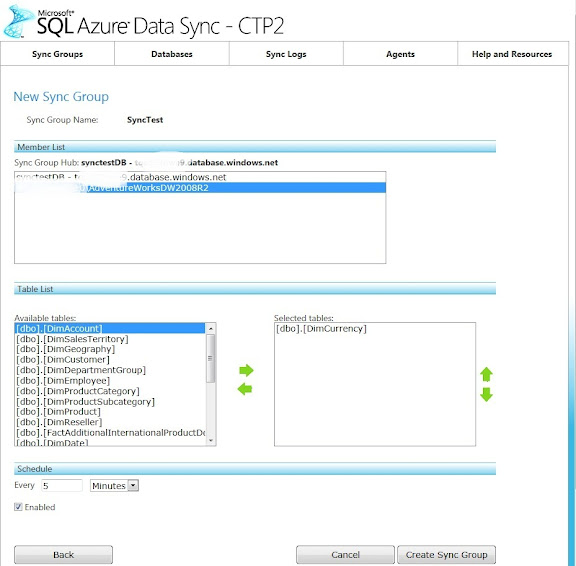
- Select the tables from each server that you want to synchronize.
- Check the "Enabled" checkbox and set your preferable schedule time for the synchronization.
- Click "Create Sync Group".
- Well, that all for the demonstration. You may view the Synchronization logs from the "Sync Logs" tab.
No comments:
Post a Comment