When Amazon Seller account problems arise, it’s tempting to tell
Amazon what you think they want to hear. Unfortunately, this can mean
fake invoices, doctored documents and false statements.
This short-term solution can destroy your account. If Amazon
detects falsified invoices or documentation, they will suspend you –
and it can be nearly impossible to come back from this kind of
suspension.
On the flip side, telling the truth just might get what you want from
Seller Performance. In a recent case, one of our clients had multiple
major problems with his accounts. Brutal honesty resulted in a
super-fast reinstatement.
Here are a few tips:
Don’t rush. Yes, it’s faster and easier to doctor an invoice. Instead, take the time to get the real – and right – documentation.
Be clear. Sometimes, the reason you’re in a pickle
is a good and valid one. Explain it briefly, with any evidence you can
provide to back your story.
Don’t give in. It is so tempting to lie because you
need your products to sell – right now. It’s better to see lower,
slower revenue numbers than to take actions that might kill your
account.
For Amazon sellers, can’t log in to my amazon account, it’s a
nightmare scenario. They try to log in to their seller account, but just
can’t. The error might say something like, “You don’t have permission
to access this account,” or worse, “This email address is not associated
with an Amazon seller account.”
What’s a seller to do?
First and most importantly, take these steps to protect yourself:
Make sure two people in your company have the user name and password for your Amazon seller account. This creates redundancy in case someone is sick, on vacation, gets fired or leaves.
Beyond those two people, don’t spread around your primary user name and password. Keep it safe.
For other users, create sub-user accounts. Give each person appropriate permissions – and only the permissions that they need.
If you are locked out of your account, contact Seller Support. If they can’t help, ask them to escalate to engineering.
Amazon safety ASIN suspensions are being received by more and more sellers. Typically, this means that an Amazon customer has complained because:
A food or topical was open when they received it
A product malfunctioned in a way that caused a hazard
A food or topical caused an adverse reaction
Why is Amazon quick on the draw? Oftentimes, sellers of private label
and imported products have not done any of the testing you would expect
from their national brand counterparts.
These violations tend to happen more quickly than those for inauthentic, used, missing parts and other product quality reasons.
Do you sell items with expiration dates via FBA? If your answer is yes, chances are you’re breaking the rules, and putting your ASINs – and maybe your account – in jeopardy.
Darlene loved to sell limited-edition potato chips with unusual
flavors. But it was her third account suspension. Why? Potato chips have
super-quick expiration dates.
Same for special-edition Oreos sold by Tim. He enjoyed the super-high
ROI for these snacks, and he thought that Amazon FBA promised to sell
his inventory first-in-first-out. Somehow expired packages kept making
their way to customers, yielding soggy cookies and a wave of complaints.
Most sellers don’t pay enough attention to the rules for expired products.
More importantly, they don’t apply best practices that can ensure a good customer experience.
Why should you care?When an Amazon seller
sends expired inventory to customers, Amazon sees that as a behavior
right up there with selling inauthentic goods. The item is no longer
usable. It is trash – and Amazon want better for its customers.
First, let’s talk about the rules.
Here’s what the folks at the FBA warehouse are going by:
Inventory needs an expiration date if it is a topical or consumable
product (including nutritional supplements) for human or animal
consumption. And yes, it needs an expiry date even if there is not a
date already on the packaging.
If an item is in the Health and Beauty category, and it has a
“period after opening” symbol, it should be marked to expire 900 days
after the date it is processed at the fulfillment center.
Does it have a sell-by or best-by date? Amazon considers that the same as an expiration date.
If you ship a food or beverage item to FBA, it must have a minimum
remaining shelf life of more than 105 days. Items within 50 days of
expiration date when they arrive at the warehouse will be marked for
disposal.
Now for the parts that most sellers ignore:
If a product has a consumption period because of regular use, add
that period to the 105 days. For example, if you are selling a 120-day
supply of vitamins, they need to have a shelf life of at least 225 days.
Only one expiration date is allowed per ASIN per shipping box. Don’t
mix up expiration dates – it will confuse the warehouse and the
process.
If your item has an expiration date, the date must be printed in a
font that is 36 points or larger. It should be printed in the format of
MM-DD-YYYY or MM-YYYY. If the date is in a different format on the
item’s package, it needs to be covered up with the correct format.
Case-packs, multi-packs and display boxes must have the expiration
date on the box or the bundle, as well as each individual item inside
the box or bundle.
Items that are polybagged or bubble wrapped require the expiry sticker on the outside of the package.
Why bother with expiry stickers?
Amazon claims to treat inventory on a first-in-first-out basis. So in
theory, your oldest items should sell first. In reality, this simply
does not happen.> In addition, too many sellers rely on Amazon to
track its inventory expiration dates. Let’s face it. The Amazon FBA
warehouse has too much to do as it is. They are not going to track your
expiration dates and reliably dispose of old inventory.
What’s an FBA seller to do?
Follow the rules. Sticker every individual item with an expiry date.
Amazon asks for large type because it is machine readable. This
dramatically improves your chances that old, expired inventory will not
be sold to a customer.
Track your expiration dates by inbound shipment. Create a unique
MSKU for different expiration dates to ensure that old MSKU’s are sold
out before new MSKUs are sent in to the warehouse.
When your items are within 50 days of expiration, pull them from the warehouse immediately.
Don’t expect customers to translate. If a product has a “period
after opening” or lot number, do the research. Determine the appropriate
date with the manufacturer, and label it accordingly with an expiration
date.
What’s an MFN seller to do?
If it’s hard to read, add a label. Many sellers in Health and
Personal Care assume that MFN shipments don’t need expiration dates.
While this is technically true, it can lead to problems. Customers want
to know the expiration date. If it’s difficult to decipher, add a
sticker with the correct date.
If it’s from overseas, add a label. Products from other countries
often put expiry dates in DD-MM-YYYY format. This can lead to complaints
of expired products. Add a sticker so that customers are not confused.
If it has a lot number or “period after opening” date, add a label.
Again, reassure your customers. Tell them when the expiration date
actually is, so they will not accuse you of selling old product.
Need more strategies to ensure you always sell fresh, usable product? Call on Riverbend Consulting for ideas and advice.
As developers, we always seek ways to do our job better, whether by
following patterns, using well-written libraries and frameworks, or what
have you. In this article, I’ll share with you a JavaScript
specification for easily consumable functions. This article is intended
for JavaScript developers, and you’ll learn how to write JavaScript
functions with a universal API that makes it easy for those functions to
be consumed. This would be particularly helpful for authoring npm
packages (as we will see by the end of this article).
There is no
special prerequisite for this article. If you can write a JavaScript
function, then you’ll be able to follow along. With all that said, let’s
dive in.
What Are Machines?
Machines are self-documenting and predictable JavaScript functions that follow the machine specification, written by Mike McNeil. A machine is characterized by the following:
It must have one clear purpose, whether it’s to send an email, issue a JSON Web Token, make a fetch request, etc.
It must follow the specification, which makes machines predictable for consumption via npm installations.
As an example, here
is a collection of machines that provides simple and consistent APIs
for working with Cloudinary. This collection exposes functions
(machines) for uploading images, deleting images, and more. That’s all
that machines are really: They just expose a simple and consistent API
for working with JavaScript and Node.js functions.
Features of Machines
Machines
are self-documenting. This means you can just look at a machine and
knows what it’s doing and what it will run (the parameters). This
feature really sold me on them. All machines are self-documenting,
making them predictable.
Machines are quick to implement, as we will see. Using the machinepack tool for the command-line interface (CLI), we can quickly scaffold a machine and publish it to npm.
Machines
are easy to debug. This is also because every machine has a
standardized API. We can easily debug machines because they are
predictable.
Are There Machines Out There?
You
might be thinking, “If machines are so good, then why haven’t I heard
about them until now?” In fact, they are already widely used. If you’ve
used the Node.js MVC framework Sails.js,
then you have either written a machine or interfaced with a couple. The
author of Sails.js is also the author of the machine specification.
In addition to the Sails.js framework, you could browse available machines on npm by searching for machinepack, or head over to http://node-machine.org/machinepacks, which is machinepack’s registry daemon; it syncs with npm and updates every 10 minutes.
Machines
are universal. As a package consumer, you will know what to expect. So,
no more trying to guess the API of a particular package you’ve
installed. If it’s a machine, then you can expect it to follow the same
easy-to-use interface.
Now that we have a handle on what machines are, let’s look into the specification by analyzing a sample machine.
The Machine Specification
module.exports ={
friendlyName:'Do something',
description:'Do something with the provided inputs that results in one of the exit scenarios.',
extendedDescription:'This optional extended description can be used to communicate caveats, technical notes, or any other sort of additional information which might be helpful for users of this machine.',
moreInfoUrl:'https://stripe.com/docs/api#list_cards',
sideEffects:'cacheable',
sync:true,
inputs:{
brand:{
friendlyName:'Some input',
description:'The brand of gummy worms.',
extendedDescription:'The provided value will be matched against all known gummy worm brands. The match is case-insensitive, and tolerant of typos within Levenstein edit distance <= 2 (if ambiguous, prefers whichever brand comes first alphabetically).',
moreInfoUrl:'http://gummy-worms.org/common-brands?countries=all',
required:true,
example:'haribo',
whereToGet:{
url:'http://gummy-worms.org/how-to-check-your-brand',
description:'Look at the giant branding on the front of the package. Copy and paste with your brain.',
extendedDescription:'If you don\'t have a package of gummy worms handy, this probably isn\'t the machine for you. Check out the `order()` machine in this pack.'}}},
exits:{
success:{
outputFriendlyName:'Protein (g)',
outputDescription:'The grams of gelatin-based protein in a 1kg serving.',},
unrecognizedFlavors:{
description:'Could not recognize one or more of the provided `flavorStrings`.',
extendedDescription:'Some **markdown**.',
moreInfoUrl:'http://gummyworms.com/flavors',}},fn:function(inputs, exits){// ...// your code herevar result ='foo';// ...// ...and when you're done:return exits.success(result);};}
The snippet above is taken from the interactive example on the official website. Let’s dissect this machine.
From
looking at the snippet above, we can see that a machine is an exported
object containing certain standardized properties and a single function.
Let’s first see what those properties are and why they are that way.
friendlyName This is a display name for the machine, and it follows these rules:
is sentence-case (like a normal sentence),
must not have ending punctuation,
must be fewer than 50 characters.
description This
should be a clear one-sentence description in the imperative mood (i.e.
the authoritative voice) of what the machine does. An example would be
“Issue a JSON Web Token”, rather than “Issues a JSON Web Token”. Its
only constraint is:
It should be fewer than 80 characters.
extendedDescription (optional) This
property provides optional supplemental information, extending what was
already said in the description property. In this field, you may use
punctuation and complete sentences.
It should be fewer than 2000 characters.
moreInfoUrl (optional) This
field contains a URL in which additional information about the inner
workings or functionality of the machine can be found. This is
particularly helpful for machines that communicate with third-party APIs
such as GitHub and Auth0.
sideEffects (optional) This is an optional field that you can either omit or set as cacheable or idempotent. If set to cacheable, then .cache() can be used with this machine. Note that only machines that do not have sideEffects should be set to cacheable.
sync (optional) Machines are asynchronous by default. Setting the sync option to true turns off async for that machine, and you can then use it as a regular function (without async/await, or then()).
inputs
This
is the specification or declaration of the values that the machine
function expects. Let’s look at the different fields of a machine’s
input.
brand Using the machine snippet above
as our guide, the brand field is called the input key. It is normally
camel-cased, and it must be an alphanumeric string starting with a
lowercase letter.
No special characters are allowed in an input key identifier or field.
friendlyName This is a human-readable display name for the input. It should:
be sentence-case,
have no ending punctuation,
be fewer than 50 characters.
description This is a short description describing the input’s use.
extendedDescription Just like the extendedDescription field on the machine itself, this field provides supplemental information about this particular input.
moreInfoUrl This is an optional URL that provides more information about the input, if needed.
required By default, every input is optional. What that means is that if, by runtime, no value is provided for an input, then the fn
would be undefined. If your inputs are not optional, then it’s best to
set this field as true because this would make the machine throw an
error.
example This field is used to determined the expected data type of the input.
whereToGet This
is an optional documentation object that provides additional
information on how to locate adequate values for this input. This is
particularly useful for things like API keys, tokens, and so on.
whereToGet.description This
is a clear one-sentence description, also in the imperative mood, that
describes how to find the right value for this input.
extendedDescription This provides additional information on where to get a suitable input value for this machine.
exits
This is the specification for all possible exit callbacks that this machine’s fn implementation can trigger. This implies that each exit represents one possible outcome of the machine’s execution.
success This
is the standardized exit key in the machine specification that
signifies that everything went well and the machine worked without any
errors. Let’s look at the properties it could expose:
outputFriendlyName This is simply a display name for the exit output.
outputDescription This short noun phrase describes the output of an exit.
Other
exits signify that something went wrong and that the machine
encountered an error. The naming convention for such exits should follow
the naming convention for the input’s key. Let’s see the fields under
such exits:
description This is a short description describing when the exit would be called.
extendedDescription This
provides additional information about when this exit would be called.
It’s optional. You may use full Markdown syntax in this field, and as
usual, it should be fewer than 2000 characters.
You Made It!
That
was a lot to take in. But don’t worry: When you start authoring
machines, these conventions will stick, especially after your first
machine, which we will write together shortly. But first…
Machinepacks
When authoring machines, machinepacks are what you publish on npm. They are simply sets of related utilities for performing common, repetitive development tasks with Node.js. So let’s say you have a machinepack that works with arrays; it would be a bundle of machines that works on arrays, like concat(), map(), etc. See the Arrays machinepack in the registry to get a full view.
Machinepacks Naming Convention
All
machinepacks must follow the standard of having “machinepack-” as a
prefix, followed by the name of the machine. For example,
machinepack-array, machinepack-sessionauth.
Our First Machinepack
To better understand machines, we will write and publish a machinepack that is a wrapper for the file-contributors npm package.
Getting Started
We require the following to craft our machinepack:
Machinepack CLI tool You can get it by running:
npminstall -g machinepack
Note: I am assuming that Node.js and npm are already installed on your machine.
Generating Your First Machinepack
Using
the CLI tools that we installed above, let’s generate a new machinepack
using the machinepack generator. Do this by first going into the
directory that you want the generator to generate the files in, and then
run the following:
yo machinepack
The
command above will start an interactive process of generating a
barebones machinepack for you. It will ask you a couple of questions; be
sure to say yes to it creating an example machine. Note:I noticed that the Yeoman generator has some issues when using Node.js 12 or 13. So, I recommend using nvm, and install Node.js 10.x, which is the environment that worked for me.
If everything has gone as planned, then we would have generated the base layer of our machinepack. Let’s take a peek:
The above are the files generated for you. Let’s play with our example machine, found inside the machines directory. Because we have the machinepack CLI tool installed, we could run the following:
machinepack ls
This would list the available machines in our machines directory. Currently, there is one, the say-hello machine. Let’s find out what say-hello does by running this:
machinepack exec say-hello
This will prompt you for a name to enter, and it will print the output of the say-hello machine.
As
you’ll notice, the CLI tool is leveraging the standardization of
machines to get the machine’s description and functionality. Pretty
neat!
Let’s Make A Machine
Let’s
add our own machine, which will wrap the file-contributors and
node-fetch packages (we will also need to install those with npm). So,
run this:
npminstall file-contributors node-fetch --save
Then, add a new machine by running:
machinepack add
You
will be prompted to fill in the friendly name, the description
(optional), and the extended description (also optional) for the
machine. After that, you will have successfully generated your machine.
Now,
let’s flesh out the functionality of this machine. Open the new machine
that you generated in your editor. Then, require the file-contributors
package, like so:
Note:We are using node-fetch package and the global.fetch = fetch workaround because the file-contributors package uses windows.fetch() internally, which is not available in Node.js.
The file-contributors’ getFileContributors requires three parameters to work: owner (the owner of the repository), repo (the repository), and path (the path to the file). So, if you’ve been following along, then you’ll know that these would go in our inputs key. Let’s add these now:
...
inputs:{
owner:{
friendlyName:'Owner',
description:'The owner of the repository',
required:true,
example:'DominusKelvin'},
repo:{
friendlyName:'Repository',
description:'The Github repository',
required:true,
example:'machinepack-filecontributors'},
path:{
friendlyName:'Path',
description:'The relative path to the file',
required:true,
example:'README.md'}},...
Now, let’s add the exits. Originally, the CLI added a success exit for us. We would modify this and then add another exit in case things don’t go as planned.
exits:{
success:{
outputFriendlyName:'File Contributors',
outputDescription:'An array of the contributors on a particular file',
variableName:'fileContributors',
description:'Done.',},
error:{
description:'An error occurred trying to get file contributors'}},
Finally let’s craft the meat of the machine, which is the fn:
And voilà! We have crafted our first machine. Let’s try it out using the CLI by running the following:
machinepack exec get-file-contributors
A prompt would appear asking for owner, repo, and path,
successively. If everything has gone as planned, then our machine will
exit with success, and we will see an array of the contributors for the
repository file we’ve specified.
Usage In Code
I
know we won’t be using the CLI for consuming the machinepack in our
code base. So, below is a snippet of how we’d consume machines from a
machinepack:
var FileContributors =require('machinepack-filecontributors');// Fetch metadata about a repository on GitHub.
FileContributors.getFileContributors({
owner:'DominusKelvin',
repo:'vue-cli-plugin-chakra-ui',
path:'README.md'}).exec({// An unexpected error occurred.error:function(){},// OK.success:function(contributors){
console.log('Got:\n', contributors);},});
Conclusion
Congratulations!
You’ve just become familiar with the machine specification, created
your own machine, and seen how to consume machines. I’ll be glad to see
the machines you create.
Earth’s most customer-centric company. The unofficial creed of Amazon.com. A place where the customer comes first, last and always.
Amazon sets a high bar. In most situations the customer usually gets the benefit of the doubt. This tendency translates into:
Acceptance of late returns, past the 30-day window
A blind eye to used items, opened items and even old, nasty items that are returned for an exchange or refund
Refunds, concessions and gift cards for even the smallest misstep – or no misstep at all
While it can be frustrating for third-party sellers, Amazon’s
customer-focused policies have created a loyal customer base willing to:
Pay subscription fees for Prime delivery
Accept a premium for items that are delivered quickly
Give third-party sellers a willing and able group of millions of potential customers
What does this mean for third-party Amazon sellers?
Amazon expects its third-party sellers to offer the same kind of high-end customer service assistance that it does.
If a seller doesn’t live up to those standards, what happens? Warnings,
suspensions and other costly enforcement actions can be the result of:
A-to-z claims against merchant-fulfilled sellers
Negative feedback that is ever-harder to remove
Negative product reviews for private-label sellers
Fewer repeat sales to happy customers
As every good seller knows, A-to-z claims plus negative feedback creates a high Order Defect Rate. And this can create an account suspension.
Best practices for Amazon customer service
Don’t put black marks on your Amazon account by mistreating
customers. Follow Amazon’s lead to provide amazing customer service.
This will reduce your risk – and your blood pressure.
Answer customer messages quickly. Shoot for an average response time under eight hours. Amazon answers even faster, so a long wait makes customers antsy.
Write excellent customer service messages. Chances
are, your company receives the same five to 10 customer questions time
and again. Create high-quality templates to answer customer questions,
and require your customer service folks to use them every time. Ensure
the tone is friendly and concerned. And provide the exact information
they requested. If you don’t like your customer service messages, hire
someone to write templates. (Call us!)
Apologize when needed. Don’t hesitate to take responsibility when the customer is unhappy – even if it wasn’t completely your fault.
Pay for quality shipping – especially overseas. Not
all package delivery services are created equal. Ensure that you choose
reliable, high-quality carriers. Cheaper is not always better.
Look for trends. Even when your customers don’t
reach out to you directly, they are leaving clues about your business.
High returns show dissatisfaction with specific ASINs. Bad feedback or
negative reviews reveal problems with orders or products. Run reports
weekly and uncover the biggest problem areas. Solve two problems a week,
and soon your business will be more profitable than ever.
Hit the refund button – fast. Don’t make customers
beg for refunds. If they are unhappy, just give the money back, if at
all possible. This will head off all manner of complaints and customer
service problems. Set a price point cutoff. If The price of the item is
below X, your customer service team is empowered to immediately provide a
refund.
Never, ever argue. Customers can be frustrating.
And let’s face it – not everybody is honest. Some art trying to get
something for nothing. That simply doesn’t matter to Amazon. Treat every
customer as a valuable, important person – no matter what
Amazon is refusing to release funds, they are permanently holding funds for some suspended sellers
Amazon
appears to have made a recent policy change, where it will permanently
attached the funds of some suspended sellers. Yes, Amazon is refusing to
release funds.
This has happened in the past in cases of counterfeit or fraud. But
now, Amazon is going after sellers who it deems have engaged in a
pattern of repeatedly breaking Amazon’s rules.
For example, a client was selling products that Amazon deems
“prohibited” for sale on the platform, even though they are legal in all
50 states. Amazon didn’t like the way our client listed the products.
Instead of simply suspending him, they also attached the nearly $20,000
in his account – and say they will never give it back.
We are working to get the funds released and will keep the community updated.
The moral of the story? Don’t engage in a pattern of breaking
Amazon’s rules. They will figure it out. And now, they might just be a
lot more aggressive about ensuring you never do it again.
Is being an Amazon Vendor killing your profit margins?
We are hearing a growing refrain in the Amazon marketplace. An
increasing number of vendors are approaching us with the complaint that
their relationship with Amazon has turned into a one-sided affair.
These vendors – whether working via the Vendor Central or Vendor
Express programs – are working hard to provide the inventory, product
quality and responsiveness requested by Amazon. However, in return, they
feel like they are:
Hammered by downward pricing pressure
Unable to offer product variations they know would be successful
Frequent victims of stock-outs and lost sales
Unsupported by promotions and marketing efforts
Beaten down by the Amazon warehouse, which confuses product
variations, fulfills orders incorrectly, receives inbound shipments
slowly and inaccurately, and loses or damages large quantities of
inventory
Nickel-and-dimed by mandatory co-op fees, return fees and operational fees
For these vendors, we suggest a new strategy that has the potential
to increase sales, while almost certainly improving profitability.
Basic Amazon selling account types
There are three ways a company can sell on Amazon:
A third-party seller account, where the company sells directly to Amazon’s customers. Orders can be Fulfilled by Amazon (FBA) or fulfilled by the seller.
A Vendor Express account, which is designed to transition
third-party sellers to Amazon’s wholesale program. Vendors in this
program have extremely limited power. Amazon sets products’ wholesale
pricing with an algorithm, and it fluctuates frequently.
A Vendor Central account, which is available by invitation only to large and successful brands. Prices and terms are negotiated up-front with Amazon.
How vendors can take their power back
Many vendors have never had a third-party selling account. They were
recruited by Amazon for the power and attractiveness of their brands.
Others were once third-party sellers, but transitioned to vendor
accounts in hopes of an easier, smoother and more profitable experience
on Amazon.
For many brands, there is a better way. Either transition exclusively
to a third-party seller account, or sell with some combination of
third-party and vendor accounts. By going direct to the consumer, with
Amazon as more of a hands-off middle-man rather than a wholesale
relationship, companies can benefit from higher margins and better
control of their catalog of products.
By moving at least some listings to a third-party selling account, vendors can reap incredible benefits:
Control of their own pricing. MAP won’t be violated, and margins can be protected.
Ability to list all product variations, which greatly enhances revenue potential.
Creation of new listings with multi-packs and variety packs. This
can result in much higher margins, since consumers will pay a premium,
while pick-and-pack fees are lower per the quantity sold.
Control over promotions and pay-per-click ads to drive additional demand.
Ability to edit and enhance listings that were neglected by Amazon Vendor account managers.
But isn’t that a lot of work?
Yes, it is. But there is a solution.
Companies like Riverbend Consulting offer Premium Account Management.
We handle all of the difficult details that make running a third-party
selling account challenging – especially for companies that are
accustomed to the wholesale model.
Fist, we focus on profitability:
We analyze your catalog of ASINs and determine which are most likely
to be more successful sold on your own account, rather than Vendor.
We examine opportunities to add successful listings, such as variations, multipacks and SKUs passed over by Amazon.com.
We enhance listings, improve SEO and launch pay-per-click campaigns to drive volume.
Then, we take on the day-to-day details of managing your third-party selling account:
Useful
Figma plugins that will help you fix all the little slowdowns and boost
your productivity. From color management and image assets to SVG shapes
and animation. That’s our new guide to Figma.
There are literally thousands of Figma plugins out there. Which ones do you use? How often do you use them? We’ve scouted for some of the useful ones, and we hope that the ones listed below will help you improve your workflow. Whether you’re just starting out with Figma
or have been using it for a good while now, this post will give you
just enough pointers to make your design process faster and smoother.
Vectary 3D Elements
makes eveything just a little bit more spatial. It’s one of the easier
ways of adding 3D mockups to your designs, as well as add layers,
wrapping and transforms. You can place your Figma design into a
preferred 3D mockup or create your custom 3D element. You can take a
closer look at the thorough guide and video about the plugin to get started.
Additionally, Figmockups and Clay Mockups 3D include a larger repository of 3D mock-ups, and Fig3D converts objects into 3D models, and you can even group shapes and move them to 3D models together.
We all want to design better and inclusive experiences, but sometimes
we might be forgetting about just the right color contrast, or a proper
tab order. Luckily, there are plenty of Figma plugins for accessibility.
Stark
is a full powerhouse on everything accessibility. It includes contrast
checking and vision simulators, and it also allows you to reorder your sequences in focus order. It also displays the contrast ratio for any two objects that you select. Alternatively, you can also use Contrast as well.
Meet Stark, an accessibility powerhouse in Figma: with tools for contrast check and vision simulators.
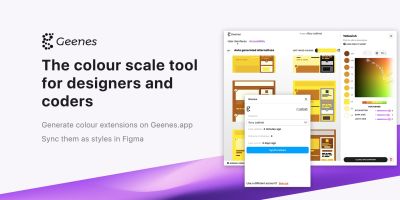
For accessible color palettes, Geenes.app
is a reliable and sophisticated tool that allows you to create,
maintain, sync and test color palettes and their variations. It’s really
difficult to imagine any Figma setup that doesn’t have this plugin
installed!
Meet Geenes, a reliable and sophisticated tool that allows you to create, maintain, sync and test color palettes and their variations.
If you need to test how a different font size will impact your layout, Text Resizer helps you to see what exactly happens with increased or decreased font sizes.
Text Resizer helps you see what exactly happens with increased or decreased font sizes.
It shouldn’t be a big revelation that creating animations in Figma
doesn’t really require sophisticated external tools like Adobe After
Effects. With Figmotion,
you have an advanced animation tool right at your fingertips. You
select a frame, add an animation, and then navigate the timeframe via a
time handle — with the option to update easing, keyframes and anchor
points.
Figmotion, an advanced animation tool right at your fingertips in Figma.
How do you usually handle annotations when working with Figma? We
came across two annotation kits that make communication on a design a
lot smoother and less prone to misunderstandings.
One of them is Annotation Kit 2.0:
A variety of sticky notes and measuring lines and tools make it easy to
add context and annotations for your team members as you’re working.
The A11y Annotation Kit
focuses on accessibility considerations that designers might want to
share with developers when handing off a design. Whether it’s adding callouts for elements,
indicating focus order, or specifying keyboard interactions, the kit
translates some of the often cryptic WCAG wording into easy-to-use
stickers that you can use to highlight key parts of the page. All
components are pre-filled with the correct CSS or HTML elements.
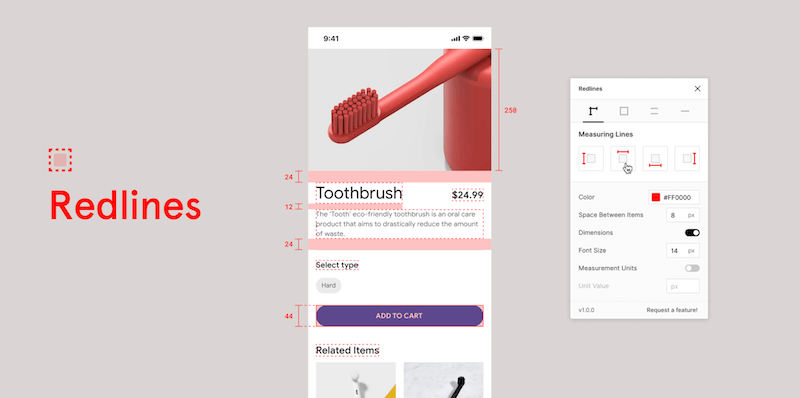
Annotating a design with detailed measurements and specs to help the
developers in charge make sense of it all can be a time-consuming
process. Redlines
is here to change that. The plugin helps you quickly measure and plot
dimensions of any selected object. All you need to do is select one or
more layers, customize the redline settings, and choose a redline option
to plot.
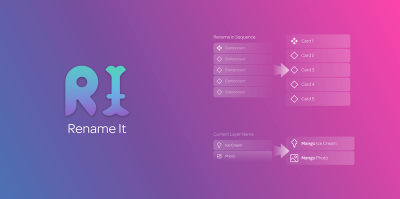
When it comes to organizing your design files, Rename it
has got your back. You can batch rename your frames and layers. You can
also rename multiple layers at once by applying custom filters. If you
want to convert the layer name case from uppercase to lowercase or even
camel case, you can use %* with a combination of letters to convert.
Rename-It is quite self-explanatory, allowing you to rename multiple layers and frames at once.
Sometimes we need to plug in a bit more than just text strings, and
perhaps we need a few more options for our avatars. That’s where UI Faces can help.
Thousands of avatars available straight from Figma: UI Faces.
All avatars are collected from various sources (they are always
provided), and they can be filtered by age, gender and emotion, but of
course you need to check the source and the license before actually
using it. Additionally, take a look at User Profiles.
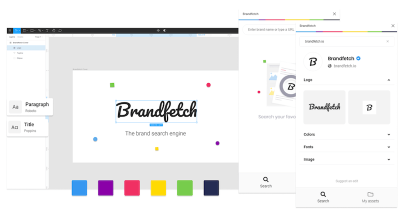
Perhaps you’d like to display some brand logos in reviews or
testimonials, so how would you go around finding all the right logos? BrandFetch
helps you easily insert brand assets into your design without leaving
your Figma window. The plugin has a large library of (literally)
millions of logos available at your fingertips. There is also a searchable database for you to find what you are looking for.
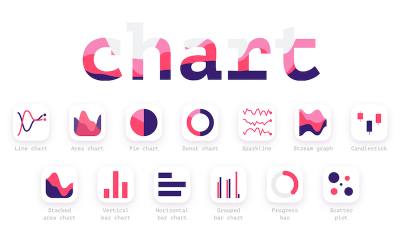
Your design process just got a bit less stressful. With Chart,
you can create various charts using real or random data easily. The
plugin supports copy and paste from Excel, Google sheet, Numbers and it
also can sync with Google Sheets and remote JSON. Alternatively, you can
also import CSV and JSON files.
Another plugin with a similar but slightly different title is the Charts Figma plugin.
With it, you can create dashboards and presentations or pretty much any
other type of data visualization. The plugin generates editable charts
in your Figma design from simple bar charts to more complex heatmaps.
You can also find a detailed guide on how to use the plugin.
Perhaps you’ve dropped a few dozens of icons in a frame, so how would
you arrange them in a sensible order? Obviously, we wouldn’t do such a
task manually. That’s where LilGrid can help.
Creating order out of chaos: LilGrid organzes items in a grid.
The little helper takes elements and arranges them into a grid
automatically. You just need to select what you’d like to organize, hit
“Organize to Grid” and the tool takes care of the rest, rearranging only
top-level elements on your page. Obviously, there is a one-step undo if
you need to restore the initial state.
Hidden layers, single-layer groups, X and Y positions that aren’t quite pixel-perfect — the Clean Document
plugin takes care of little flaws like these so you don’t have to. A
great little helper to polish up your Figma project before handoff.
With the Content Reel
plugin, you can design layouts quickly and easily by using text
strings, images, icons and avatars from the same tool. You can search or
browse through the already provided set of data, then add them to your
designs or create from scratch.
The plugin also lets you create your own text strings, upload up to
20 images, and make your workflow easier and smoother by pinning your
frequently used content on your home screen.
Content Reel helps when you need to plug in content into your designs.
You can also run a Random Name Generator to populate random names into your mock-up.
Understanding gradients, palettes, color theory and psychology are
essential to creating pleasant visual designs. Figma has plenty of
plugins that take a bulk of this work off your shoulders.
Color Palette
provides you with a perfect color palette for your projects. You can
choose from a huge library of palettes or search for a specific color
code, name or number to apply to your design.
Palette
by Dustin Mierau is useful when you want to generate a color palette
from images. This plugin uses machine learning to help you generate a
color palette that will best fit your project. You can select up to five shapes and the plugin will help fill in the shapes with colors fitting for your palette.
When designing around an image, making the right color choice is easier with the Image Palette plugin.
It uses any image that you select and generates a color palette from it
by selecting the five most prominent colors from the image using a
median cut algorithm with a high level of accuracy.
With UI Gradients and Web Gradients,
you do not have to create or select gradients one at a time, but
instead, you can add several gradients to groups, texts and frames with
just a single click.
With the Arc plugin,
you can curve your text upwards, downwards, or even into a circle. The
plugin adds an additional toolbar for controlling the bending — it’s
another question though how developers would implement it.
Another Figma plugin you might want to add to your toolkit comes from
Lukas Oppermann. If you’re tired of the hassle that working with design
tokens usually brings along, the Design Token
plugin does the job for you: styles and tokens are exported and sent to
a GitHub repository and tokens are automatically converted using style
dictionary. No need for you to leave Figma. A real timesaver.
Imagine you’re making a change in your project’s design system, and it’s immediately cascading through your Figma project. The Design System Manager plugin for Figma makes it possible.
The plugin lets you define or update themeable design tokens
in one single panel, manage selected layers grouped by style, and
populate a design with real text or image content. To bring your project
to life, you can programatically access the design tokens from the
GraphQL API or you export them in the format of your choice (CSS, Less,
Sass, JSON, YAML, Js, Swift, and Android are supported). A smart
solution that makes dealing with design systems a lot more practical.
The quality of your presentation as a designer is almost as important
as the design itself. With over 700 device mock-ups scenes, Mockuuups Studio
helps you create mockups for products, visual content, or marketing
materials with ease and efficiency. You can watch a thorough walkthrough video on how to use it.
With Mockuuups, you can place your frames into 700+ device mock-ups, without leaving Figma.
Usually mock-ups only look nicer when a device is displayed in a human’s hand, and that’s where All hands mockup generator
can help. It includes a large and diverse collection of hands of all
shades, shapes and sizes. Select a frame, choose a hand and your designs
will be imported into the mockup, all within Figma. You can review the full collection of hands as well.
Human hands are usually better than plain device mock-ups: All Hands Mock-up Generator gets the job done well.
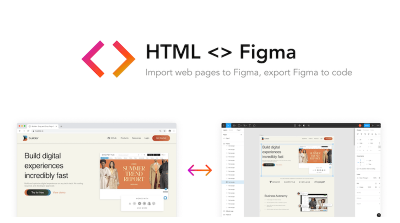
HTML <> Figma
allows you to export your Figma designs to an HTML prototype. You can
select individual layers, or enter an URL you’d like to import, and the
plugin will import actual styles immediately. There’s also a Chrome extension that captures a web page and imports it as editable Figma layers. In the background, it generates a page.builder.json file which has all the CSS properties of the current page.
Mostly quite reliable: HTML < > Figma allows you to export your Figma designs to an HTML prototype.
There are some limitations though as not all element types and CSS
properties are supported. Also, it’s worth keeping in mind that all
fonts have to be uploaded to Figma or fallback fonts will be used.
Still, the plugin is open-source, has a large community around it, and
the creators are actively maintaining it.
Alternatively, there is also an HTML Generator that supports Google Fonts, has dedicated export options and generates HTML, CSS, image assets and SCSS code and Figma To HTML. And if you need something more sophisticated, Anima
creates prototypes and converts them to HTML, CSS and React code —
without any dependencies. In fact, you can create interactive
prototypes, responsive designs and reusable React components out of the
box. (The plugin has a free tier, but you will need to sign up for the $31 tier to export the code).
If you want to remove some of the friction that turning a Figma
prototype into a working application can bring along, Klaus Schaefer’s
open-source plugin Figma-Low-Code is for you. It lets you use Figma designs directly in Vue.js applications.
This low-code approach does not only reduce the hand-off time
between designers and developers as well as the amount of front-end
code, but also ensures that the Figma design stays the single source of
truth. The idea is that you design the prototype in Figma, then use the
plugin to add data and method binding. Once you’ve done that, you can
use your favorite code editor to implement business logic, and — ta-daa!
— your application is ready for deployment. Changes you make to the
Figma file are automatically propagated to the web app.
There aren’t many people who are very fond of building HTML Emails,
but when designing one, we better use some handy little plugins to make
the developer’s work a little bit easier. In fact, there is a detailed guide on designing emails in Figma that covers the entire workflow of shipping brand new email designs from scratch.
HTML Email Workflow, from start to finish — a thorough guide to designing emails with Figma.
If you are looking for responsive, production-ready HTML emails for Figma, Emailify
will give you dozens of configurable content modules, allow you to
customize your text, images, styles and auto-layout settings amongst
other features, with no other APIs, apps, or websites required.
Emailify includes dozens of configurable content modules for HTML Emails.
If you aren’t frightened of the idea of HTML Email code being generated for you, Email Templates & Code works with the Marka plugin
to actually produce HTML code. You can have customizable emails with
designs for newsletters, marketing email and blog-style templates. Also,
there are plenty of customizable designs there as well.
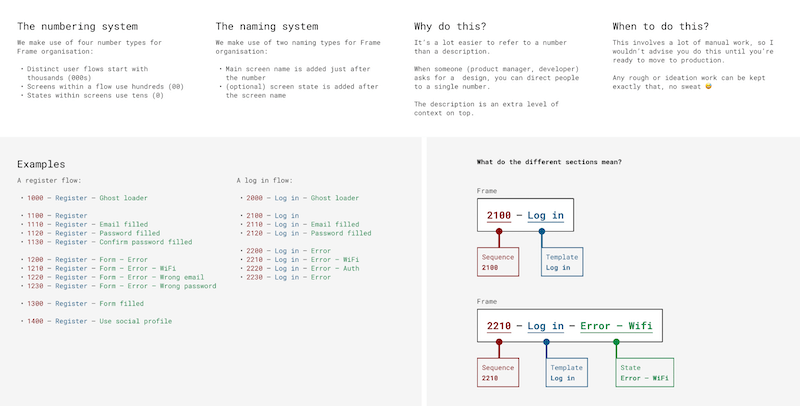
We all know that it can be hard to think of Figma file structure when
you’re completely absorbed in getting all those little UI details right
in the design you’re currently working on. However, if you keep file
structure in mind right from the very beginning, you can ensure that
handoff will be buttery smooth. And you’ll save yourself a lot of
cleaning up work once the deadline comes closer. Luis Ouriach published a
helpful best-practice guide for structuring your frames in Figma — with consistent naming conventions, descriptive components, and consistent spacing.
Switching between typefaces manually can be a little bit tiring, so obviously there are Figma helpers for that. Better Font Picker and Font Preview help you select fonts with a preview.
Font Preview allows you to preview fonts in Figma. No big revelation, but helpful nevertheless.
If you use Google Fonts, Google Font Pairings can come in handy, too. You can get started at Figma’s Google Fonts page. Each of the fonts comes with a tiny type specimen to get a decent preview of the style and feel of the typefaces used.
Having a wide collection of every possible icon out there in one
place is arguably one of the best plugin ideas ever. Figma has plugins
that contain icon sets in several styles for any type of design project.
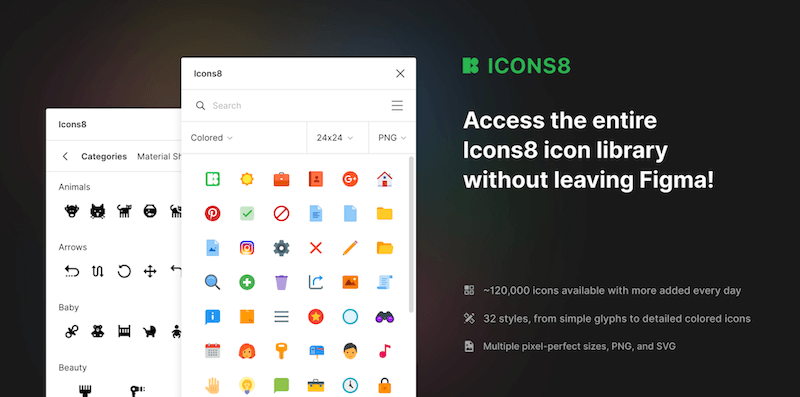
Icons8
provides you with a large collection of consistent icons without having
to leave your Figma board. It has a library of 120,000+ icons with over
32 popular design styles, searchable and categorized collection, all
available in PNG or SVG.
Iconscout
allows you to insert millions of high-quality icons, illustrations, and
3D into Figma. In a designer mode, you can pick your favorite designer
and photographer and access their resources directly without searching
in the entire library.
Illustrate with a vector software, then import it into your design,
right? You don’t have to do it all the time as Figma comes with plenty
of illustration plugins.
With Blush, you can create or mix-and-match illustrations
customized to your projects. You can also generate random compositions;
plus, new illustrations are being added every week. SVGs and
high-resolution images are available on a paid plan.
Mix-and-match illustrations to meet your needs, with Blush.
For lovely icons and illustrations, take a closer look at the Free Popular Illustration library, which includes high quality free illustrations released under a Creative Commons license.
If you want to add a human illustration to your website, Humaaans
provides you with already pre-made illustrations of funky and hip
people. You can browse from a gallery or search for a specific niche or
category.
Humaaans features a large library of pre-made illustrations of people.
Additionally, you can use Storyset
with 100s of illustrated concepts available as off-the-shelf
illustrations. You can also edit the styles, colors, and background.
Plus, you can also animate the illustrations.
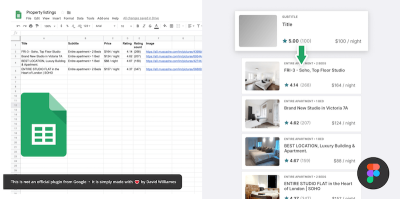
Quite often, copy-pasting data from Google Docs into Figma is quite time-consuming and frustrating. Google Sheet
is a handy plugin that speeds up the import of your Google Sheets to
Figma. Once you install it, you can fetch and sync data from your Google
Sheets. There is also a documentation
with all the fine details on how to set up a proper sheet structure and
how Figma layers should be named to avoid extra work — as well as some
examples for you to get started.
Less hassle with the Google Sheets plug-in — plus, you can fetch and sync data from it as well.
A few weeks ago, Figma launched a beta version of their Interactive Components
feature that allows you to create interactive elements that
automatically switch between variants (a button changing from hover to a
pressed state, for example). What might seem like a little detail,
turns out to reduce the amount of frames and connections you usually
need to prototype input fields like checkboxes or toggles tremendously.
To dive in deeper into the new feature, Steve Ruiz summarized what it is capable of
and what can be achieved with it if you think outside the box (a
Minesweeper or Battleship game running in Figma, anyone?). Another great
read: Rodrigo Osornio explored the advantages and possibilities which Interactive Components brings along for micro interactions such as input fields, loaders, different kinds of buttons, dropdowns, and subscribe components.
Speaking of components: Luke Cardoni shows how he managed to create a
single, content-adaptable, fully customizable, and easily maintainable component with 3,360 variants
that serves every possible combination of settings for text input. A
mammoth project that illustrates the benefits of Figma’s Variants
feature.
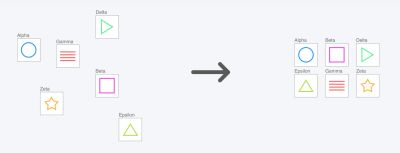
We often rely on grids to create design systems where every single
interface component is properly aligned. So it shouldn’t come as a big
surprise that there is no shortage in layout grid plugins for Figma. Grids Generator allows you to apply a family of various grid style configurations to layouts. Guide Mate is slightly more flexible: it provides shortcuts for commonly used grids and a way to add a custom grid should you need it.
Guide-Mate provides shortcuts for commonly used guides and a way to add custom guides.
Once you have a grid in place, you might want to snap your components to it. Snap to Grid not only creates a custom grid, but also arranges elements on the grid
by organizing each object automatically. When the plugin is running,
the canvas elements will snap to the grid when moving and scaling.
Andreslav Koslov shows how this plugin works in a 3-min video. You can also use keyboard shortcuts Alt + Cmd + P to snap all objects to grid when Figma is online.
Snap To Grid not only creates a custom grid, but also arranges elements on the grid by organizing each object automatically.
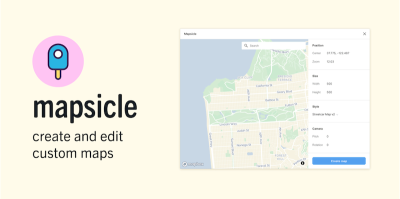
Downloading maps for your project does not have to be a long process because Mapsicle
by Chris Arvin can help you to easily insert maps into your Figma
designs. The plugin allows you to set your map to a particular location,
latitude and longitude which you want for your designs, and voilà, it
adds just the right snapshot into your design.
Mapsicle allows you to embed actual maps into your design.
However, if you needed a SVG map of a particular country or region for your design, the Vector Maps Plugin
can turn out to be very helpful. You can literally browse for countries
or regions and insert them directly into your Figma design with single
click. The maps can also be downloaded as SVG or PDF via https://vector.mapcraft.biz/constructor/.
We’ve all been there: When you’re in a rush, naming conventions are a
detail that often doesn’t get the attention it deserves. And before you
notice it, you end up with a mess of different formatting styles for
your page, frame, component, and layer names.
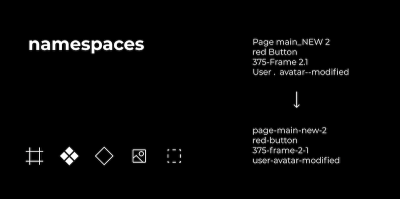
The Namespaces
plugin puts an end to the chaos and neatly names your assets following a
scheme that makes sense. Also great to unify different naming
conventions when working on a shared file together with others.
Of course we all want to be well-organized, but sometimes we might be
just a little bit distracting when naming our frames. That’s when Figma Exporter
can help. It lets you select the naming convention you want for your
exported files: kebab-case, snake_case or camelCase. The rest will be
done automatically!
Figma Exporter takes good care of the names for your frames.
If you ever wanted to have a dedicated space in Figma to take notes, ideas and comments while working, Notepad
by Dustin Mierau is probably what you were looking for. Notes are
automatically saved with your documents and are available to other
editors. In a way, you can use Notepad as a shared space for documenting
your project with your team. As a side note, you need to reopen Notes
to see changes made by other editors if you are working collaboratively.
Everything is slightly better with patterns! While creating basic
patterns is usually quite straightforward, creating custom patterns
might be a tricky and intense process, and that’s where Figma’s patterns
plug-ins save the day.
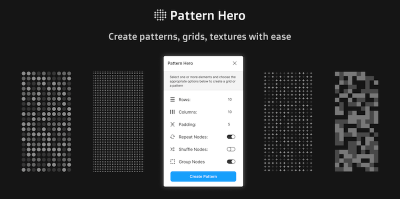
The Pattern Hero
plugin makes inserts your custom elements into a grid and repeats them
to form a pattern. You can repeat or shuffle the patterns, create
instances and also work with several templates. If you need to make a
pattern, this is a good option to use.
Simple patterns are quite easy to create Pattern-Hero.
Alternatively, Hero Patterns
is a collection of SVG background patterns. To create a unique set for
yourself, you can mix and match different patterns to come up with a
desirable pattern.
You can create more custom patterns by mixing and matching Hero Patterns.
If you need to set up some sort of a dot grid pattern in your mock-up, Dot Grid
will automate the task for you. With the tool, you can easily generate
beautiful dot grids to serve as guides throughout your design process on
Figma with customizable grid width, grid height, dot size, gap, and dot
colors.
Dot-Grid generates dot grids (how surprising!) based on your choice of grid width, height, dot size, gap and dot colors.
You don’t have to leave Figma to get custom photographic assets for your project. Of course, Unsplash is everyone’s go-to page for high-res images and now it is a plugin on Figma.
Remove backgrounds
allows you to pretty much do just that: remove backgrounds of images
easily. No need to manually edit the background of images before adding
them to your design. A caveat: you will need a remove.bg account to use the plugin.
Not many people resize boxes for living, but as designers, that’s pretty much what we have to do every now and again. In Figma, Breakpoints
is one of the many plugins for testing responsive design. It provides a
resizable instance of a frame, and works without the plugin window — so
everyone on your team can explore the responsive behavior of the frame
without having the plugin installed.
Breakpoints is one of the many plugins that create a resizable instance of a frame.
Alternatively, you can also use Responsify,
which allows you to select any frame and set custom device sizes, so
you can preview what the website or app will look in that particular
view. Responsive
is similar, and it allows you to test specific edge cases of your
responsive layout by clicking on the input frames in the plugin. Nothing
groundbreaking, but handy!
Responsify allows you to select any frame and set custom device sizes.
Automating small, tedious actions is always a good thing to save you
precious time and stay focused on what really matters. When it comes to
reversing the order of multiple layers, the Reverse Layer Order
plugin could become your new best friend. Just as its name implies, it
will reverse the order of two or more layers within the same parent. All
you need to do is select them and run the plugin.
Creating basic shapes is easy. However, creating complex shapes might
take valuable time that you can’t really afford to lose when working on
a project. Figma’s plugins all around shapes and SVG can make your work
easier, with a variety of shapes to choose from.
Blobs
helps you improve the aesthetics of your design. With blobs, you can
create and add organic shapes into your Figma designs using two
parameters: complexity and contrast. You can also control how unique a
shape is as well as the number of points it has.
Blobs generates organic shapes, and plugs them right into Figma.
Need waves? The Get Waves
plugin helps you generate SVG wave patterns for your designs. It can be
quite useful when working with charts, graphs or designs with crests
and troughs. You just have to choose a curve, adjust the complexity and
randomize.
If you are trying to create a wave and curve pattern for your design, the Wave & Curve
plugin by Andreslav Kozlov can help you generate waves in various
patterns. You can also choose the direction of the waves either Top and Bottom, Top, or Bottom.
Finally, To Path
helps you put things on a path and can work with texts, shapes,
objects, and components. To curve text around a path (a circle, for
example), you can install the plugin, then remove circle opacity, select
text, and circle, and then use the plugin to link both objects and
watch the magic happen.
When you need to place objects on a path, To Path can feel quite magical.
Some other features of the plugin include repeating shapes along any
path, editing the original shape or text and reflecting changes in
real-time (while the plugin is open), and editing the path afterwards,
and again, watch the linked objects change.
So you have a Figma design that you want to present to a client, your boss, or your team? Pitchdeck
is here to help you do just that. The plugin turns your design into
animated slide decks or, if you prefer, exports it for PowerPoint,
Keynote, or Google. PDF export is also supported, as well as a number of
handy features like webcam overlay, video embeds, speaker notes, and
more. It’s even possible to record your presentation as a video with
microphone audio.
Although designing data tables can be quite time-consuming, the Table Generator
plugin makes this easier by helping you automate dealing with tabular
data. All you need for table generation is to copy and paste the data
(currently in CSV format).
Alternatively, you can also use Table-Paste to paste data from an Excel spreadsheets into styled table rows, or Table-Creator to create resizabled custom-styled tables. A little bonus: you can also update all tables anytime your design changes.
First, there’s only one person on the Figma project board, then
another one joins in, and soon you’ll see the cursors of designers,
developers, project managers, content designers, researchers, and many
others spread across the screen. You’ve probably experienced this
scenario before. But did all of these people actually find the information they needed? Did they have to dig around or was it easily discoverable?
The team at Shopify took these questions as an occasion to rethink the structure of their Figma playground
and ensure it meets the diverse needs of teams across the company.
Apart from sharing the process in an article, they distilled their
findings into a project index template that you can download and use right away. A handy little helper to give everyone involved in your project the context they need, when they need it.
Sometimes you’re in a situation where you need to replace a piece of
text in your Figma mockup. No big deal — well, unless that piece of text
appears in multiple instances across the design. A fantastic little
time-saver for those occasions is Content Buddy.
Instead of having to look up all instances, components, frames, and
groups one by one and changing the text manually, Content Buddy does the
heavy lifting for you: It provides you with a list of each unique text
content in your design so that you only need to select the items you
want to replace and enter the new replacement text — once.
Convert any white and black bitmap images to vectors using the Image Tracer plugin.
This plugin saves you the time you’d manually trace with the pen tool
or use Illustrator to convert to vectors. On running the plugin, you
will see a console on the window with options to help you make edits to
your taste.
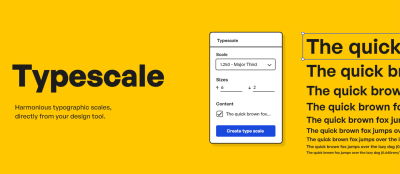
You’ve been there before. You need to look up the right values for a
typographic scale of your design, but you don’t have them at hand?
Marvin Bruns’ Typescales and Scaale allow you to generate harmonious, responsive typographic scales, based on your choice of ratio — without leaving Figma. As always, you start with a base-value, font-size increments and decrements from that size, and a multiplier.
Better typography with reliable typographic scale: Typescale helps you out when you need it.
Ah, you need to be able to set a custom scale, too? Sam Smith’s Typescale does that for you (yep, it’s a different plugin with a similar name). Also, Textyles
generates text styles with a font preview, and if you need to generate
vertical rhythm by using a modular type scale, grid, and auto-layout, Heading-Helper has got your back, too.
Finally, Font Scale
is helpful when you want to keep the proportions between your body text
and headings the same, whether it’s on-screen or paper. Jeremy Church’s
Type-Scale is an inspiration for this plugin.
We all have been in the situation before where you need to place
something on Figma, perhaps just as a sketch or brainstorming session,
so you would take a picture, send it to yourself via email, and then
paste it in.
Mobile-Upload allows you to upload photos straight into Figma.
With Mobile upload
it’s no longer necessary. With the plugin, you can take a picture with
your phone upload it directly to Figma. This is quite useful for
notebook sketches and brainstorming sessions.
Have you ever lost resolution when bringing a large image into Figma? Or been frustrated at not being able to input a spacing value for your layers?
Or maybe you’ve been unable to resize a frame independently of its
contents? Yuan Qing Lim, product designer at Shopify, developed nine useful plugins that solve issues like these.
With the plugins, you can move layers with pixel precision, reisze
frames without also resizing their contents, copy a component, insert
unblurred large images (beyond the 4096 pixels limitation) and make
quick and precise selections.
And if you need a bit more guidance or inspiration, Louis Ouriach has created a best practice advice on how to structure frames in your files to ensure handoff is as smooth as butter.
When you are just planning your design, it might come in handy to use
wireframing tools to just get a sense of what you are going to design
in the first place.
For wireframing in Figma, no conversation will escape the mention of AutoFlow.
The plugin allows you to select objects and it will automatically draw
an arrow to connect them. A great little helper to display and explain
ideas!
Wireframe
provides a large set of wireframes, for user flow, prototypes and basic
structures. The wireframe components are divided into categories. All
files are SVGs, so you can easily edit them for your needs.
Everything for wireframing: Wireframe Figma plugin.
However, sometimes after creating a design, you might want to go back
to the wireframe to iterate a bit more, or perhaps create a slightly
different flow for your design. Wire Box
can be useful for these situtions. It converts your designs from
high-fidelity mock-ups to low-fidelity mock-ups, so you can then focus
on the overall architecture rather than the fine details of the UI.
When you need to go back to the wireframing whiteboard: Wire-Box.
Finally, you can also use oblique for creating quick shadows, 3D depth and visual perspective, and Wireframer Figma plugin to generate placeholder text for wireframes with just one click.
In this article, we explored a myriad of Figma tools, plugins and
resources that you can use to make your design process easier. There is
still a lot that we have not covered but you can explore them on the
Figma community here or share your favorite ones in the comments below!


