Discover
with Adrian what’s behind the charming glow effect on Youtube and how
you can use it to make your own videos more immersive. Deconstruct
YouTube’s “Ambient Mode” feature and learn how HTML <canvas> and the requestAnimationFrame function are used to create this glowing effect.
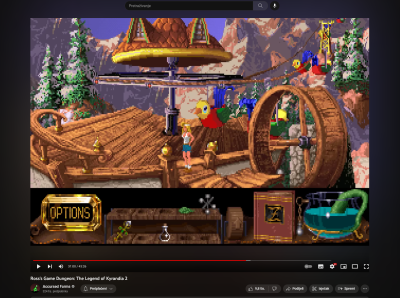
I noticed a charming effect on YouTube’s video player while using its dark theme some time ago. The background around the video would change as the video played, creating a lush glow around the video player, making an otherwise bland background a lot more interesting.
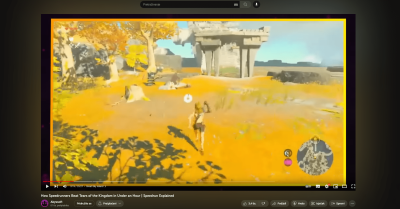
This effect is called Ambient Mode. The feature was released sometime in 2022, and YouTube describes it like this:
“Ambient mode uses a lighting effect to make watching videos in the Dark theme more immersive by casting gentle colors from the video into your screen’s background.”
— YouTube
It is an incredibly subtle effect, especially when the video’s colors are dark and have less contrast against the dark theme’s background.
Curiosity
hit me, and I set out to replicate the effect on my own. After digging
around YouTube’s convoluted DOM tree and source code in DevTools, I hit
an obstacle: all the magic was hidden behind the HTML <canvas> element and bundles of mangled and minified JavaScript code.

Despite having very little to go on, I decided to reverse-engineer the code and share my process for creating an ambient glow around the videos. I prefer to keep things simple and accessible, so this article won’t involve complicated color sampling algorithms, although we will utilize them via different methods.
Before we start writing code, I think it’s a good idea to revisit the HTML Canvas element and see why and how it is used for this little effect.
HTML Canvas #
The HTML <canvas> element is a container element on which we can draw graphics with JavaScript using its own Canvas API and WebGL API. Out of the box, a <canvas> is empty — a blank canvas, if you will — and the aforementioned Canvas and WebGL APIs are used to fill the <canvas> with content.
HTML <canvas>
is not limited to presentation; we can also make interactive graphics
with them that respond to standard mouse and keyboard events.
But SVG can also do most of that stuff, right? That’s true, but <canvas> is more performant than SVG because it doesn’t require any additional DOM nodes for drawing paths and shapes the way SVG does. Also, <canvas> is easy to update, which makes it ideal for more complex and performance-heavy use cases, like YouTube’s Ambient Mode.
As you might expect with many HTML elements, <canvas> accepts attributes. For example, we can give our drawing space a width and height:
Notice that <canvas> is not a self-closing tag, like an <iframe> or <img>.
We can add content between the opening and closing tags, which is
rendered only when the browser cannot render the canvas. This can also
be useful for making the element more accessible, which we’ll touch on
later.
Returning to the width and height attributes, they define the <canvas>’s coordinate system. Interestingly, we can apply a responsive width using relative units in CSS, but the <canvas>
still respects the set coordinate system. We are working with pixel
graphics here, so stretching a smaller canvas in a wider container
results in a blurry and pixelated image.
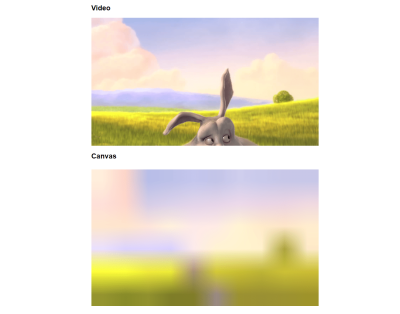
10×6 pixel coordinate system stretched to 1280px width, resulting in a pixelated image. (Image source: Big Buck Bunny video)(Large preview)The downside of <canvas> is its accessibility.
All of the content updates happen in JavaScript in the background as
the DOM is not updated, so we need to put effort into making it
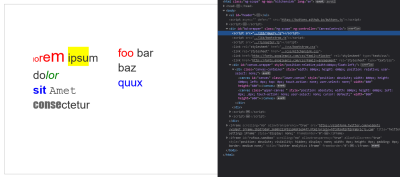
accessible ourselves. One approach (of many) is to create a Fallback DOM by placing standard HTML elements inside the <canvas>, then manually updating them to reflect the current content that is displayed on the canvas.
Numerous
canvas frameworks — including ZIM, Konva, and Fabric, to name a few —
are designed for complex use cases that can simplify the process with a
plethora of abstractions and utilities. ZIM’s framework has accessibility features built into its interactive components, which makes developing accessible <canvas>-based experiences a bit easier.
For
this example, we’ll use the Canvas API. We will also use the element
for decorative purposes (i.e., it doesn’t introduce any new content), so
we won’t have to worry about making it accessible, but rather safely
hide the <canvas> from assistive devices.
That said, we will still need to disable — or minimize — the effect for those who have enabled reduced motion settings at the system or browser level.
requestAnimationFrame #
The <canvas> element can handle the rendering part of the problem, but we need to somehow keep the <canvas> in sync with the playing <video>and make sure that the <canvas> updates with each video frame. We’ll also need to stop the sync if the video is paused or has ended.
We could use setInterval in JavaScript and rig it to run at 60fps to match the video’s playback rate, but that approach comes with some problems and caveats. Luckily, there is a better way of handling a function that must be called on so often.
That is where the requestAnimationFrame method comes in. It instructs the browser to run a function before the next repaint. That function runs asynchronously and returns a number that represents the request ID. We can then use the ID with the cancelAnimationFrame function to instruct the browser to stop running the previously scheduled function.
Now that we have all our bases covered by learning how to keep our update loop and rendering performant, we can start working on the Ambient Mode effect!
The Approach #
Let’s briefly outline the steps we’ll take to create this effect.
First, we must render the displayed video frame on a canvas and keep everything in sync. We’ll render the frame onto a smaller canvas (resulting in a pixelated image). When an image is downscaled, the important and most-dominant parts of an image are preserved at the cost of losing small details. By reducing the image to a low resolution, we’re reducing it to the most dominant colors and details, effectively doing something similar to color sampling, albeit not as accurately.
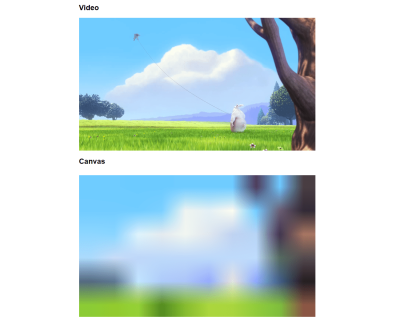
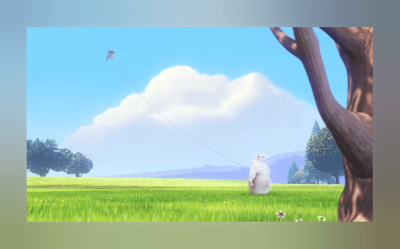
Next, we’ll blur the canvas, which blends the pixelated colors. We will place the canvas behind the video using CSS absolute positioning.
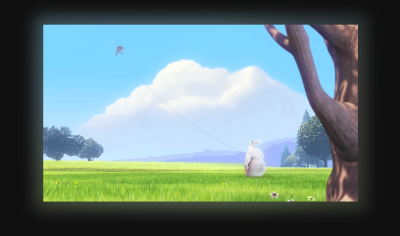
And finally, we’ll apply additional CSS to make the glow effect a bit more subtle and as close to YouTube’s effect as possible.
HTML Markup #
First, let’s start by setting up the markup. We’ll need to wrap the <video> and <canvas> elements in a parent container because that allows us to contain the absolute positioning we will be using to position the <canvas> behind the <video>. But more on that in a moment.
Next, we will set a fixed width and height on the <canvas>, although the element will remain responsive. By setting the width and height attributes, we define the coordinate space in CSS pixels. The video’s frame is 1920×720, so we will draw an image that is 10×6
pixels image on the canvas. As we’ve seen in the previous examples,
we’ll get a pixelated image with dominant colors somewhat preserved.
Syncing <canvas> And <video> #
First, let’s start by setting up our variables. We need the <canvas>’s rendering context to draw on it, so saving it as a variable is useful, and we can do that by using JavaScript’s getCanvasContext function. We’ll also use a variable called step to keep track of the request ID of the requestAnimationFrame method.
Next, we’ll create the drawing and update loop functions. We can actually draw the current video frame on the <canvas> by passing the <video> element to the drawImage function, which takes four values corresponding to the video’s starting and ending points in the <canvas> coordinate system, which, if you remember, is mapped to the width and height attributes in the markup. It’s that simple!
Now, all we need to do is create the loop that calls the drawImage function while the video is playing, as well as a function that cancels the loop.
And finally, we need to create two main functions that set up and clear event listeners on page load and unload, respectively. These are all of the video events we need to cover:
loadeddata: This fires when the first frame of the video loads. In this case, we only need to draw the current frame onto the canvas.seeked: This fires when the video finishes seeking and is ready to play (i.e., the frame has been updated). In this case, we only need to draw the current frame onto the canvas.play: This fires when the video starts playing. We need to start the loop for this event.pause: This fires when the video is paused. We need to stop the loop for this event.ended: This fires when the video stops playing when it reaches its end. We need to stop the loop for this event.
Let’s check out what we’ve achieved so far with the variables, functions, and event listeners we have configured.
That’s the hard part! We have successfully set this up so that <canvas> updates in sync with what the <video> is playing. Notice the smooth performance!
Blurring And Styling #
We can apply the blur() filter to the entire canvas right after we grab the <canvas> element’s rendering context. Alternatively, we could apply blurring directly to the <canvas> element with CSS, but I want to showcase how relatively easy the Canvas API is for this.
Now all that’s left to do is add CSS that positions the <canvas> behind the <video>. Another thing we’ll do while we’re at it is apply opacity to the <canvas>
to make the glow more subtle, as well as an inset shadow to the wrapper
element to soften the edges. I’m selecting the elements in CSS by their
class names.
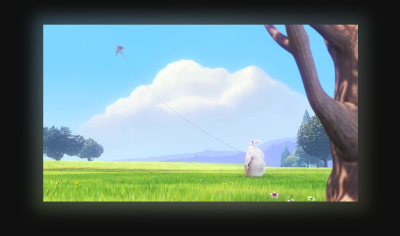
We’ve managed to produce an effect that looks pretty close to YouTube’s implementation. The team at YouTube probably went with a completely different approach, perhaps with a custom color sampling algorithm or by adding subtle transitions. Either way, this is a great result that can be further built upon in any case.
Creating A Reusable Class #
Let’s make this code reusable by converting it to an ES6 class so that we can create a new instance for any <video> and <canvas> pairing.
Now, we can create a new instance by passing the id values for the <video> and <canvas> elements into a VideoWithBackground() class:
Respecting User Preferences #
Earlier, we briefly discussed that we would need to disable or minimize the effect’s motion for users who prefer reduced motion. We have to consider that for decorative flourishes like this.
The easy way out? We can detect the user’s motion preferences with the prefers-reduced-motion media query and completely hide the decorative canvas if reduced motion is the preference.
Another way we respect reduced motion preferences is to use JavaScript’s matchMedia function to detect the user’s preference and prevent the necessary event listeners from registering.
Final Demo #
We’ve created a reusable ES6 class that we can use to create new instances. Feel free to check out and play around with the completed demo.
Creating A React Component #
Let’s migrate this code to the React library, as there are key differences in the implementation that are worth knowing if you plan on using this effect in a React project.
Creating A Custom Hook #
Let’s start by creating a custom React hook. Instead of using the getElementById function for selecting DOM elements, we can access them with a ref on the useRef hook and assign it to the <canvas> and <video> elements.
We’ll also reach for the useEffect hook to initialize and clear the event listeners to ensure they only run once all of the necessary elements have mounted.
Our custom hook must return the ref values we need to attach to the <canvas> and <video> elements, respectively.
Defining The Component #
We’ll use similar markup for the actual component, then call our custom hook and attach the ref values to their respective elements. We’ll make the component configurable so we can pass any <video> element attribute as a prop, like src, for example.
All that’s left to do is to call the component and pass the video URL to it as a prop.
Conclusion #
We combined the HTML <canvas> element and the corresponding Canvas API with JavaScript’s requestAnimationFrame
method to create the same charming — but performance-intensive — visual
effect that makes YouTube’s Ambient Mode feature. We found a way to
draw the current <video> frame on the <canvas>, keep the two elements in sync, and position them so that the blurred <canvas> sits properly behind the <video>.
We covered a few other considerations in the process. For example, we established the <canvas>
as a decorative image that can be removed or hidden when a user’s
system is set to a reduced motion preference. Further, we considered the
maintainability of our work by establishing it as a reusable ES6 class
that can be used to add more instances on a page. Lastly, we converted
the effect into a component that can be used in a React project.
Feel free to play around with the finished demo. I encourage you to continue building on top of it and share your results with me in the comments, or, similarly, you can reach out to me on Twitter. I’d love to hear your thoughts and see what you can make out of it!
References #
- “
<canvas>: The Graphics Canvas element” (MDN) - “Window:
requestAnimationFrame()method” (MDN) - “
CanvasRenderingContext2D” (MDN) - “Ready for our close up: An updated look and feel for YouTube,” Nate Koechley (YouTube Blog)
No comments:
Post a Comment